Although the process of making chapati is not as simple as the recipe, it is nonetheless easy to follow. Take me back to those warm holiday mornings, when I would wake up to the sweet smoky smell of burning charcoal coming from the tiny clay oven stove located in my kitchen. I remember jumping out of bed and running straight towards it to see what my mother had in store for us.
Chapati, or “chapo,” as most natives call it, was, and is still one of my favorite dishes to this day. It was one of the many assorted meals my mother would prepare on those pleasant family gatherings and special occasions. She would mix all the ingredients in a large bowl, starting with the dry ingredients, then pour lukewarm water and oil over it, and gently knead all the elements together using the knuckles of her hand. I carefully watched as she transformed the mixture to a gooey piece of dough, which somewhat resemble pizza dough.
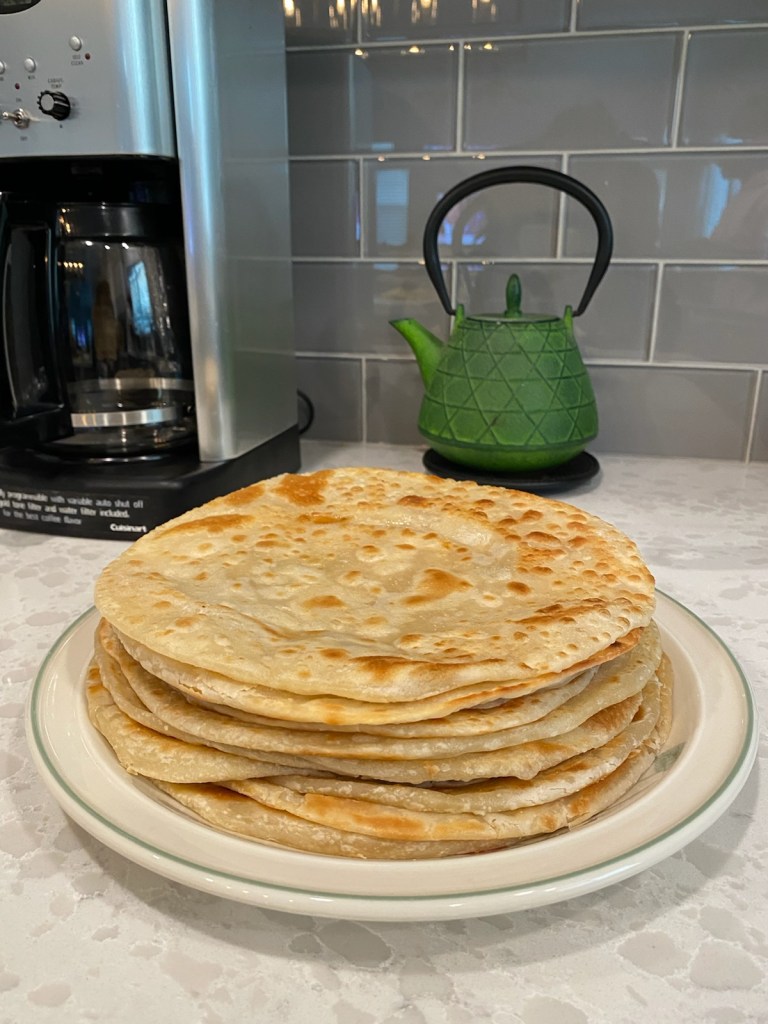
Mama would then break the dough apart, form them into little cone-shaped pieces, and set them aside on a separate tray. It was an art which she had mastered. Soon after, she rolled out the pieces, placed them on a preheated oiled skillet, then cooked both sides until they browned. The change of color was one indicator that they were ready. Dime size bubbles formed on the surface of the chapati, which often popped releasing tiny pockets of hot compressed air.
When the Chapati had browned to my mother’s likings; she wrapped them tightly on a separate plate (in order to keep them moist) and served it to us with a side of meat stew, or various types of beans. This meal was not only delicious, but also nutritious and filling.
You, my friend, haven’t lived until you have tried a piece of my mother’s hot chapatis dipped in her well seasoned stews!


Ingredients:
- 4 cups organic all-purpose flour
- 1 teaspoon of salt
- 4 tablespoons of olive oil
- 2 cups lukewarm water
Instructions:
- In a large mixing bowl, combine the flour and salt. Mix them together to evenly distribute the salt in the flour.
- Make a well in the center of the flour mixture and pour in the olive oil. Gradually add the lukewarm water while mixing with your hands or a spoon. Keep adding water until the dough comes together and is soft but not too sticky. You might not need to use all the water.
- Once the dough has formed, turn it out onto a clean and lightly floured surface. Knead the dough for about 5-7 minutes until it becomes smooth and elastic. This helps develop the gluten in the flour.
- Divide the dough into 9-10 equal-sized portions and shape them into balls. Cover the balls of dough with a damp cloth or plastic wrap and let them rest for about 15-20 minutes. This resting time makes the dough easier to work with and helps relax the gluten.
- After the resting time, take one dough ball and flatten it slightly with your hands. Roll it out into a thin, round disc using a rolling pin. You can dust the work surface with a little flour to prevent sticking.
- Brush a thin layer of olive oil over the surface of the rolled-out dough. This will help the layers of the chapati separate during cooking, making them flaky.
- Starting from one edge, begin to fold the dough into pleats, similar to folding a paper fan. Once you’ve reached the other edge, you’ll have a pleated strip of dough.
- Coil the pleated strip into a spiral, tucking the end underneath. Press it gently with your hand to flatten it slightly.
- Roll out the coiled dough again into a flat, round chapati. Try to maintain an even thickness throughout.
- Heat a skillet or griddle over medium-high heat. Place the rolled-out chapati onto the hot skillet and cook for about 1-2 minutes on each side, or until you see bubbles forming on the surface and the chapati begins to puff up. You can lightly press the edges with a spatula to encourage puffing.
- Flip the chapati and cook the other side until it’s lightly browned and cooked through. You can brush a bit more oil on this side if desired.
- Repeat the process for the remaining dough balls, rolling, coiling, and cooking each chapati individually.
- Serve the freshly cooked chapatis warm with your favorite Kenyan dishes, curries, or stews.
Enjoy your homemade Kenyan chapatis!
